Install the theme
After downloading the package, please first unzip the main package, then you will see another zip file named annette.zip. This zip file is the one to be uploaded via the WordPress admin panel.
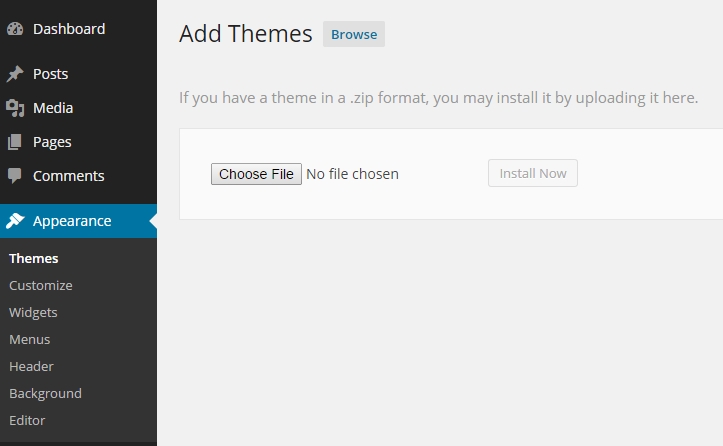
- Go to Appearance > Themes.
- Click Add New then click Upload Theme.
- Click Choose File and select the annette.zip. Then click Install Now.
- Wait until you see the “Theme installed successfully” message. After that, click the Activate link on the screen to start using the theme.
Next, we will show you how to install some required and recommended plugins for the theme.
Install plugins
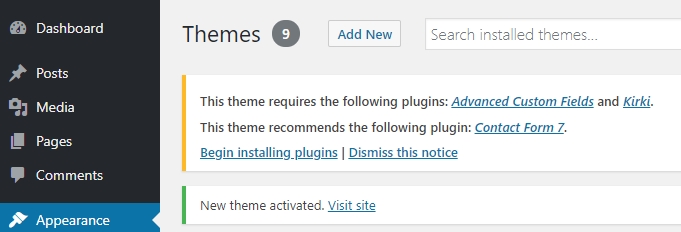
After the theme is activated, you should see a notification at the top saying that there are some required and/or recommended plugins to be installed like the below image.
To install and activate them, please follow these steps:
- Click the Begin installing plugins link or go to Appearance > Install Plugins.
- You will see a list of plugins. Tick all of them then choose Install from the drop-down list and click Apply.
- Wait until the installation is finished then click Return to Required Plugins Installer to go back to the plugin list again.
- Now tick all of them and choose Activate from the drop-down list then click Apply.
- That’s it! The plugins are just installed and activated. You should see a complete message in this step.
We will talk about importing an XML file for the demo content in the next step which is optional. You can skip it if you do not want the demo content.
Import demo data
Please follow the steps below to import an XML file to get the content similar to the demo site. (You can skip this step if you do not want the demo content.)
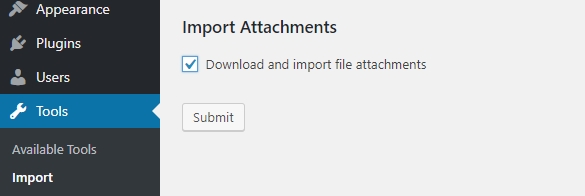
- Go to Tools > Import and click the Install Now link under the WordPress title to install the WordPress Importer tool. After the tool is installed, click Run Importer.
- Click the Choose File button then browse to the purchased package. You will see an XML file named “annettedummy.WordPress.2019-03-22.xml”. Select it and click Upload file and import.
- Don’t forget to check the Download and import file attachments checkbox before clicking the Submit button. Then wait until you see the message “All done. Have fun!”.
Complete the setup
The theme is almost ready. There are only a few steps left to complete the setup:
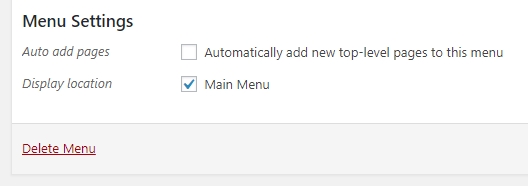
- Make sure that your site menu is selecting the correct location. To do that, go to Appearance > Menus and scroll down to the bottom. There you will see a checkbox for Main Menu. Tick it and save the menu.
- You might want to change the site title, tagline and copyright text now. To do that, go to Appearance > Customize > Site Identity and you will find the options for changing them in this section.
- All done!